
嵌入式系统LED灯编程
【实验步骤】
界面设计
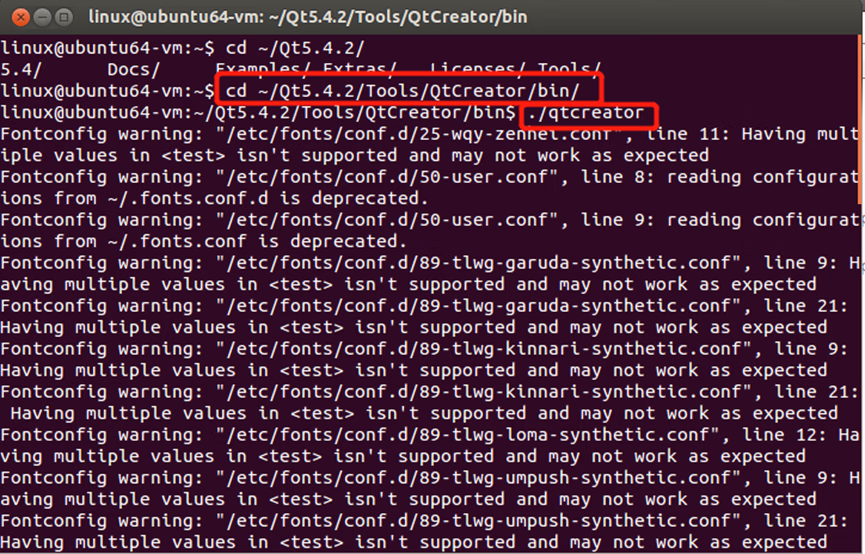
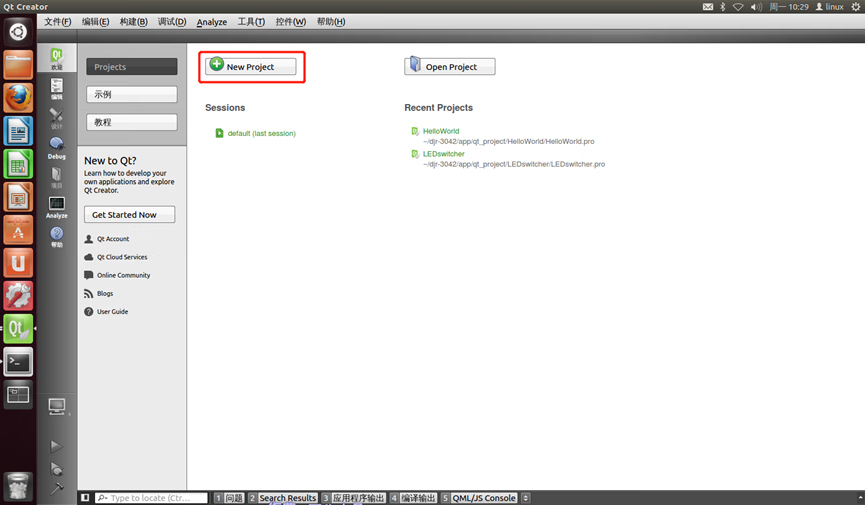
打开qtcreator, 单击左侧菜单“欢迎”,然后点击中间“New Project”
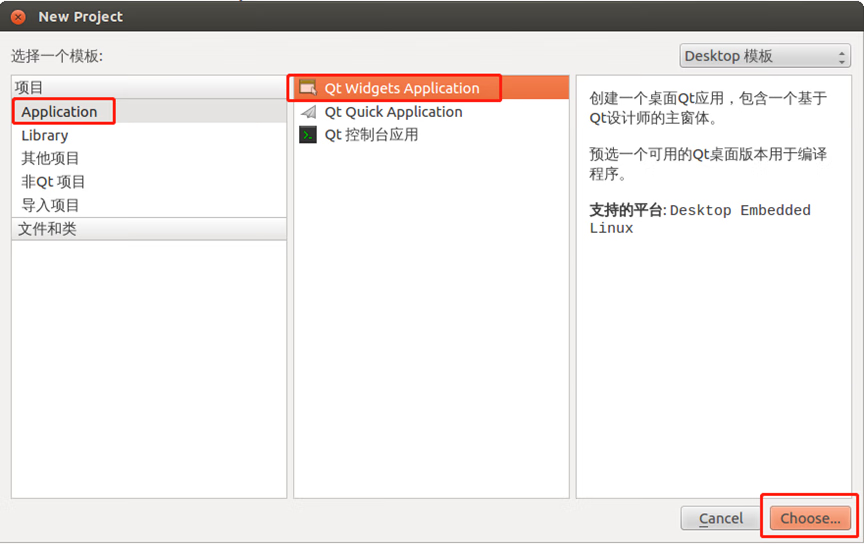
选择“Application”—”Qt Widgets Application”,后点击“Choose”按钮
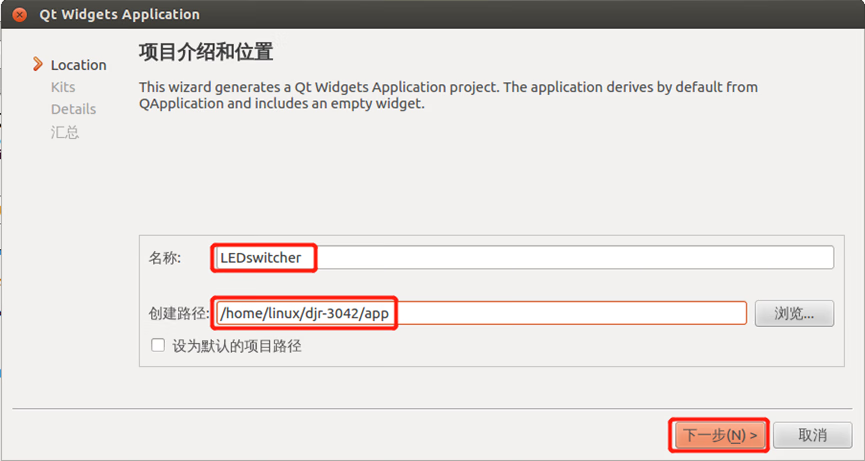
填写工程名称和工程所在路径后点击下一步
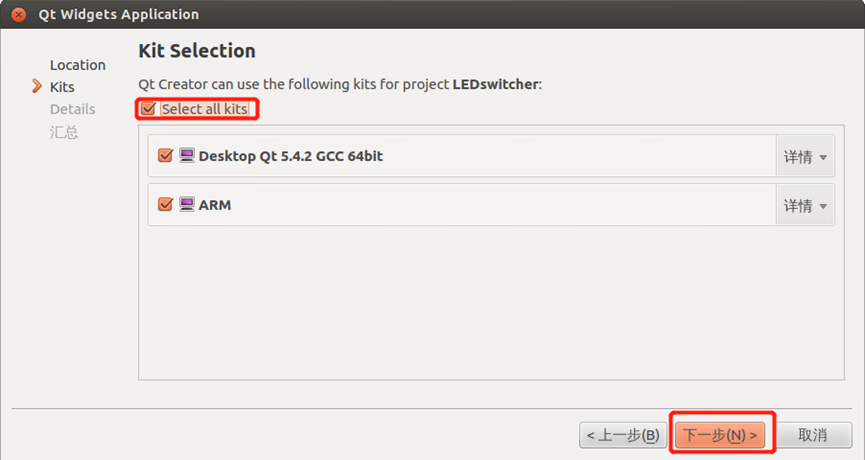
选择开发套件,一般两个都选,第一个是是程序能运行在本机模拟环境中,第二个是使程序运行在实验箱上(可在“项目”选项中对运行环境进行更改)。
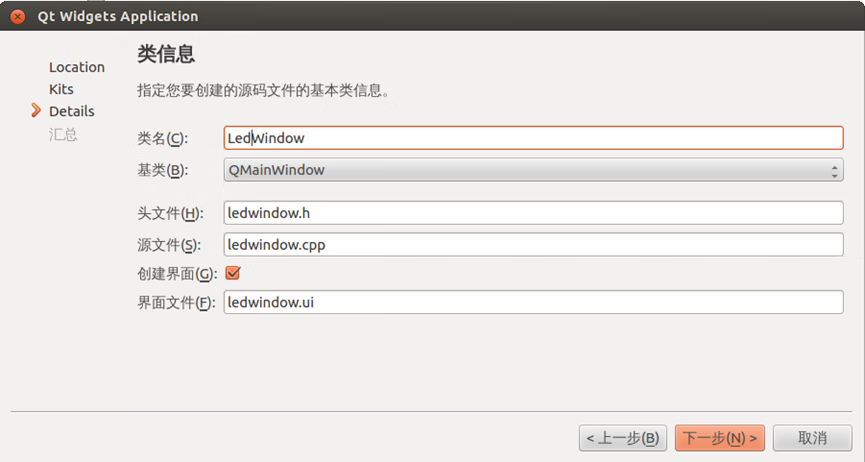
指定类名,根据自己的需求完成(本例使用LEDWindows,非图片中的LedWindow)
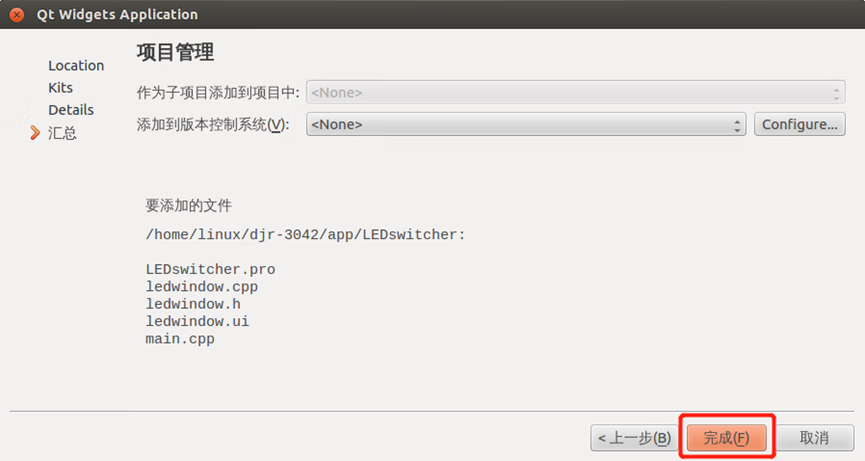
添加到版本控制系统中,本例不添加
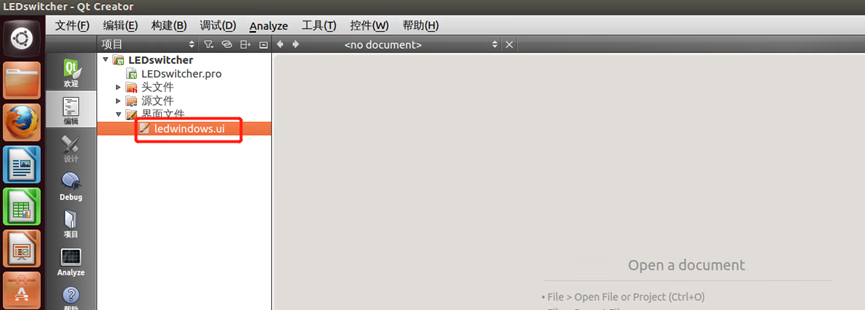
双击ledwindows.ui,展现界面
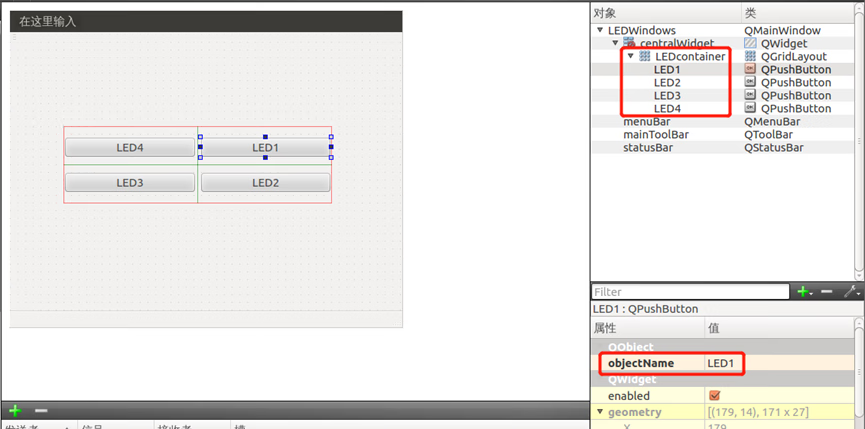
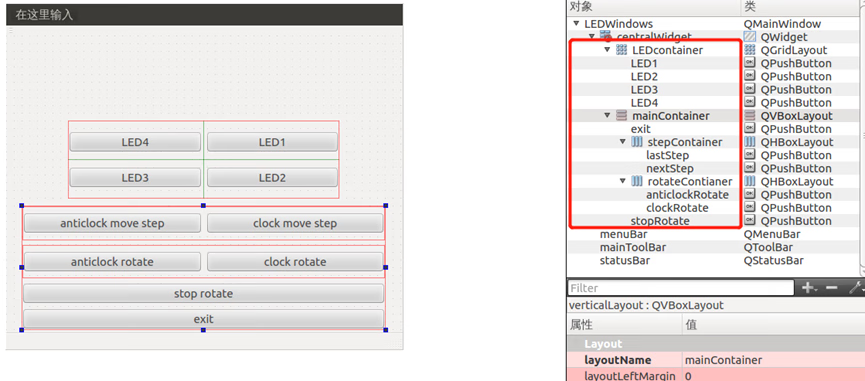
设计界面,在左边工具栏先添加一个Gird Layout,然后往Gird Layout中添加四个Push Button,按试验箱LED灯顺序命名
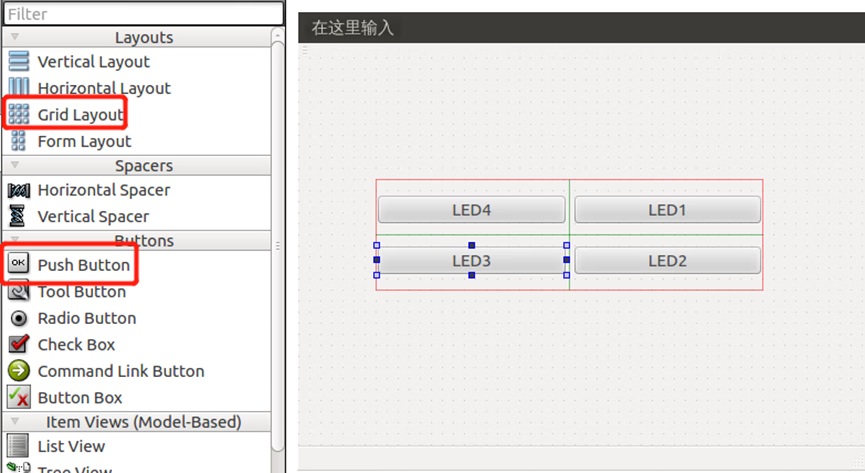
更改按钮属性,使Object Name与名字保持一致
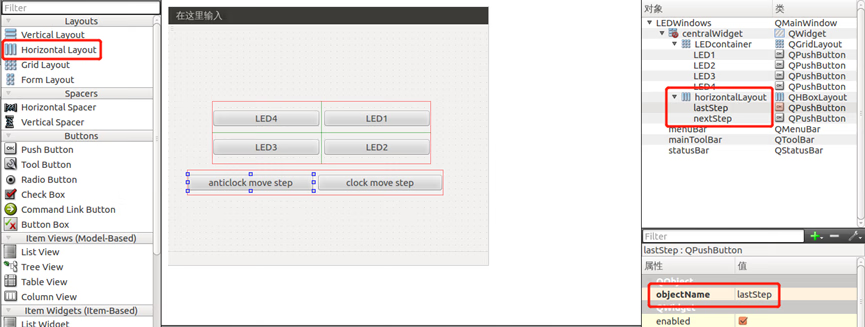
往界面添加一个Horizontal Layout,在layout中添加两个Push Button,命名为逆时针移步和顺时针移步(不建议使用中文,实验箱可能无法显示中文)更改Push Button的Object Name
与上一步相同再添加一个Horizontal Layout和两个Push Button并命名为逆时针旋转和顺时针旋转,更改Object Name

往界面中添加一个Vertical Layout,再往Vertical Layout中添加两个Push Button并命名为停止旋转和退出,更改Object Name
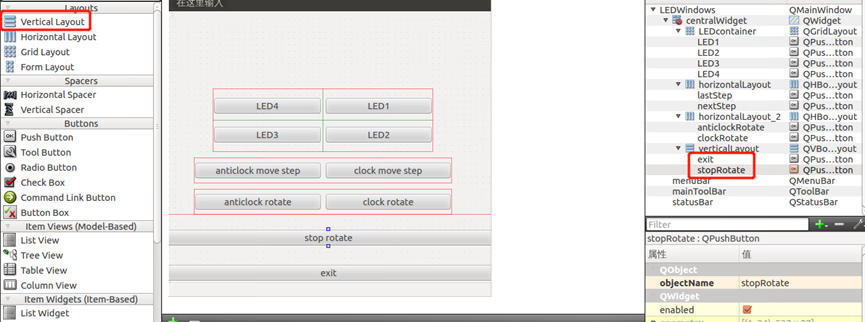
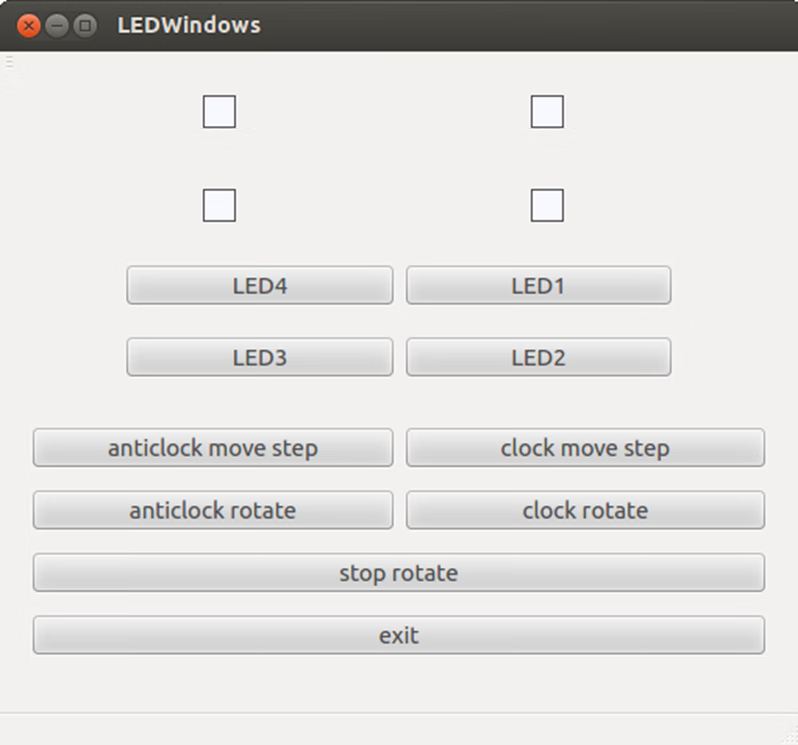
最后将前面做的两个Horizontal Layout放入最后的Vertical Layout中并调整控件大小,效果如图所示,界面元素结构如图红框所示(如果操作困难可以跳过这一步,仅仅为了美观)
添加代码
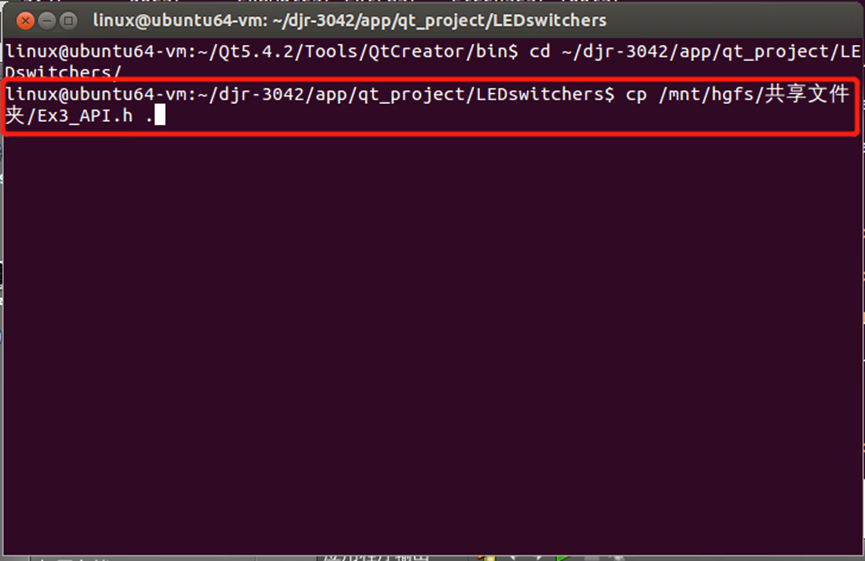
将第三次实验的工具头文件通过共享文件夹传入虚拟机中
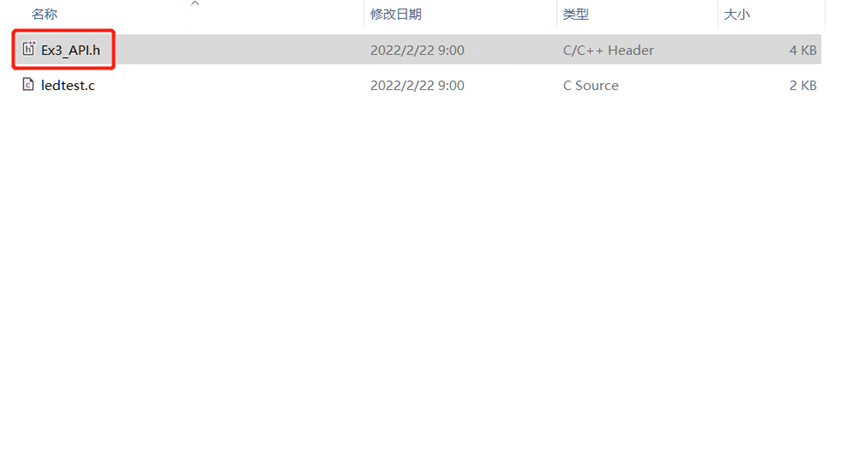
将头文件移动到项目所在目录(根据自己实际情况)
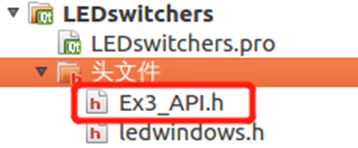
在qt中在头文件文件夹按住右键选择添加现有文件,然后选择虚拟机中刚刚导入的Ex3_API.h选择打开
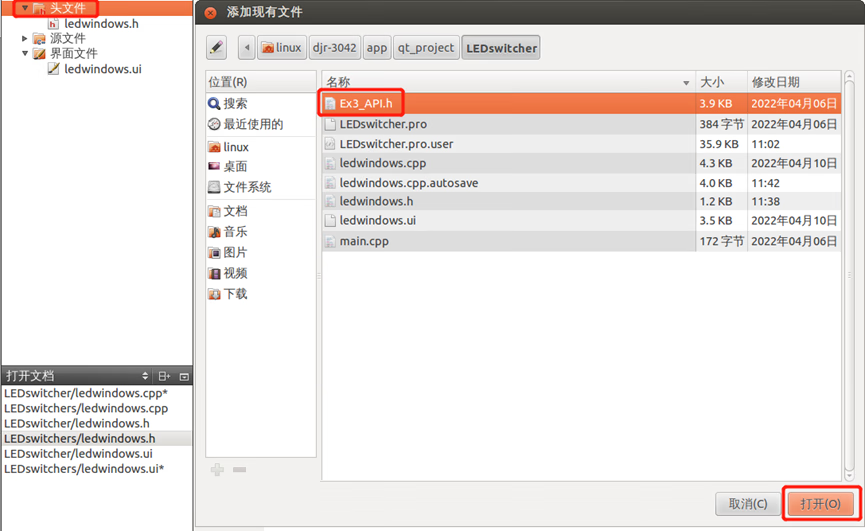
添加成功后如图所示
在头文件ledwindows.h中添加头文件声明,并定义函数和变量
#ifndef LEDWINDOWS_H
#define LEDWINDOWS_H

#include <QMainWindow>
#include <QTimer>
#include <QPainter>

#include "Ex3_API.h"
#include <stdio.h>
#include <stdint.h>
#include <stdlib.h>
#include <fcntl.h>
#include <unistd.h>
#include <sys/ioctl.h>
#include <termios.h>
#include <pthread.h>
#include <signal.h>

namespace Ui {
class LedWindows;
}

class LedWindows : public QMainWindow
{
    Q_OBJECT

public:
    explicit LedWindows(QWidget *parent = 0);
    ~LedWindows();

protected:
    void paintEvent(QPaintEvent *);
    void initLED();
    bool toggleLEDState(int);
    void moveLEDLeft();
    void moveLEDRight();
    void hardwareMove(int position);
    void hardwareStop();
    void displayAllLED(bool* newStates);
    bool* getStates();
    void syncStates();
private:
    Ui::LedWindows *ui;

    const static int LED_NUM = 4;
    QVector<QRect> LEDRects;
    bool states[LED_NUM];
    QTimer *timer;
};

#endif // LEDWINDOWS_H
添加绘制LED状态代码,打开ledwindows.cpp(其中LEDWindows::initLED() 方法中的矩形坐标根据自己的界面设计调整)
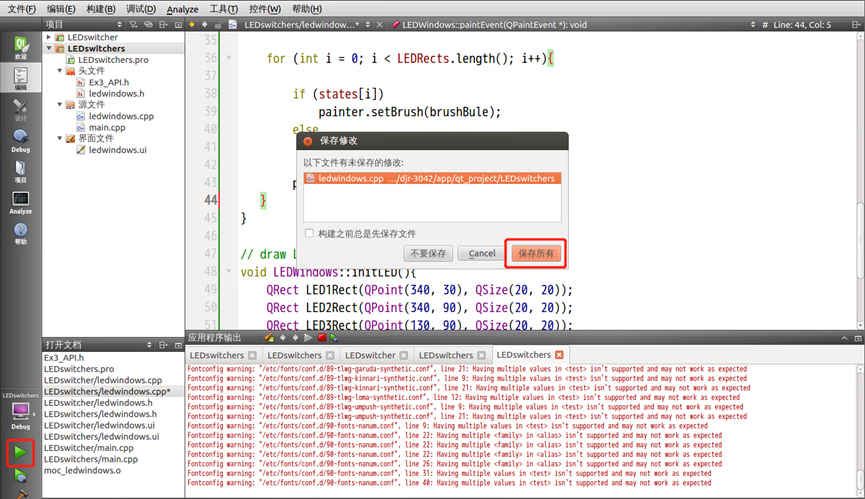
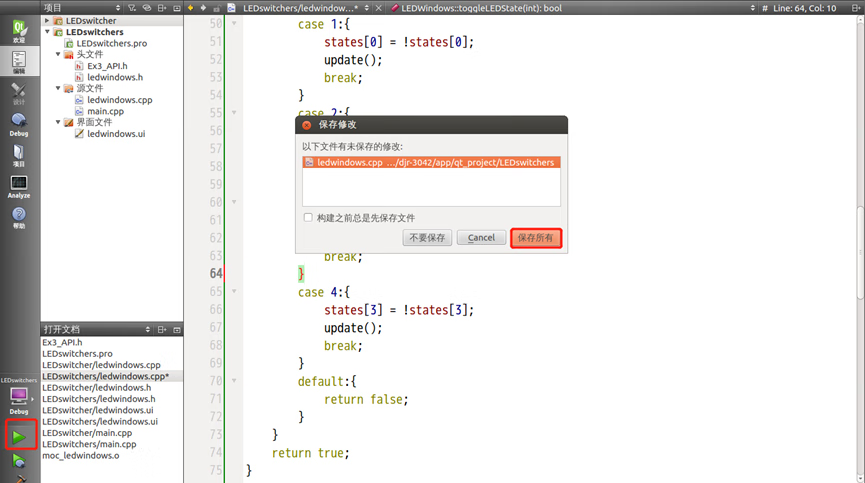
#include "ledwindows.h"
#include "ui_ledwindows.h"

QColor ghostWhite(248,248,255);
QColor royalBlue(65,105,225);

int fd_LED = open(LED, O_RDWR);
int delay = 500;
bool isRotated = false;

LEDWindows::LEDWindows(QWidget *parent) :
    QMainWindow(parent),
    ui(new Ui::LEDWindows)
{
    ui->setupUi(this);

    LEDRects = QVector<QRect>();
    // init LED states
    for (int i = 0; i < LED_NUM; i++){
        states[i] = false;
    }
    LEDWindows::initLED();
    timer = new QTimer(this);
}

LEDWindows::~LEDWindows()
{
    delete ui;
}

void LEDWindows::paintEvent(QPaintEvent *event){
    QPainter painter(this);
    QBrush brushWhite(ghostWhite);
    QBrush brushBule(royalBlue);

    for (int i = 0; i < LEDRects.length(); i++){

        if (states[i])
            painter.setBrush(brushBule);
        else
            painter.setBrush(brushWhite);

        painter.drawRect(LEDRects.at(i));
    }
}

// draw LED rectangle
void LEDWindows::initLED(){
    QRect LED1Rect(QPoint(340, 30), QSize(20, 20));
    QRect LED2Rect(QPoint(340, 90), QSize(20, 20));
    QRect LED3Rect(QPoint(130, 90), QSize(20, 20));
    QRect LED4Rect(QPoint(130, 30), QSize(20, 20));

    LEDRects.append(LED1Rect);
    LEDRects.append(LED2Rect);
    LEDRects.append(LED3Rect);
    LEDRects.append(LED4Rect);
}
点击运行,选择保存所有,运行界面应如图所示(此时是在模拟环境)
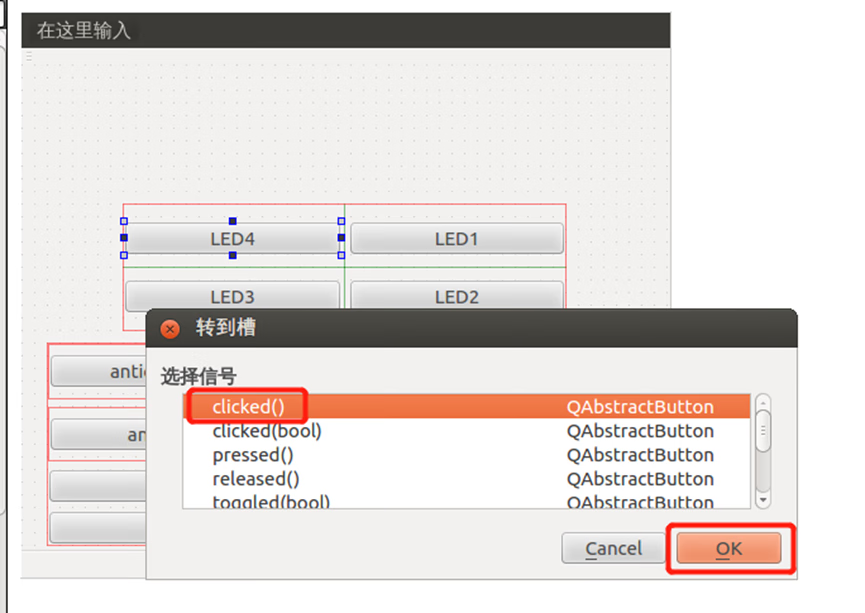
编写按键逻辑代码,选择ledwindows.ui打开界面编辑,在led4按钮上长按右键选择【转到槽】,并选择【clicked()】方法
编写逻辑代码,代码如下
void LEDWindows::on_LED4_clicked()
{
  if(!isRotated){
      if (LEDWindows::toggleLEDState(4))
          FS4412_LED_switch(fd_LED, 4);
      else
          printf("ERROR: Can not toogle LED state!\n");
  }else{
      printf("WARNING: Can not change state while rotating\n");
  }
}
仿造上一步的操作添加其他LED按键的逻辑代码,代码如下(注意对应关系)
void LEDWindows::on_LED1_clicked()
{
    if(!isRotated){
        if (LEDWindows::toggleLEDState(1))
            FS4412_LED_switch(fd_LED, 1);
        else
            printf("ERROR: Can not toogle LED state!\n");
    }else{
        printf("WARNING: Can not change state while rotating\n");
    }
}

void LEDWindows::on_LED2_clicked()
{
    if(!isRotated){
        if (LEDWindows::toggleLEDState(2))
            FS4412_LED_switch(fd_LED, 2);
        else
            printf("ERROR: Can not toogle LED state!\n");
    }else{
        printf("WARNING: Can not change state while rotating\n");
    }
}

void LEDWindows::on_LED3_clicked()
{
    if(!isRotated){
        if (LEDWindows::toggleLEDState(3))
            FS4412_LED_switch(fd_LED, 3);
        else
            printf("ERROR: Can not toogle LED state!\n");
    }else{
        printf("WARNING: Can not change state while rotating\n");
    }
}
编写切换LED状态工具方法,代码如下
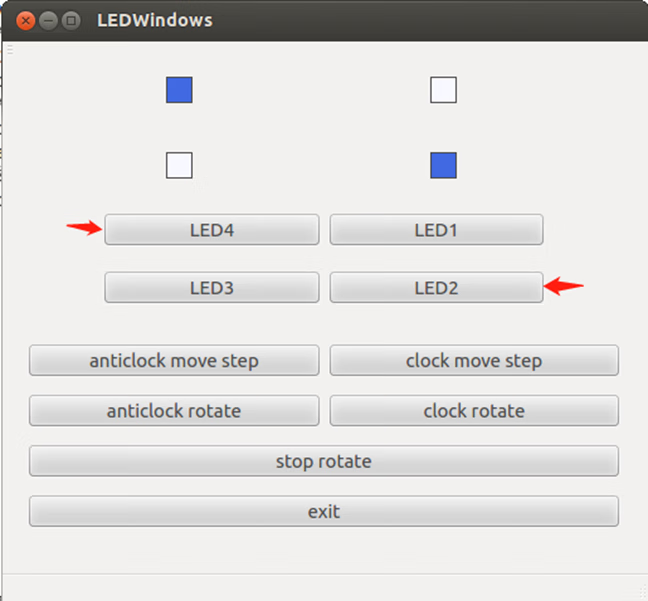
// switch LED state utils
bool LEDWindows::toggleLEDState(int numOfLED){
    switch (numOfLED){
        case 1:{
            states[0] = !states[0];
            update();
            break;
        }
        case 2:{
            states[1] = !states[1];
            update();
            break;
        }
        case 3:{
            states[2] = !states[2];
            update();
            break;
        }
        case 4:{
            states[3] = !states[3];
            update();
            break;
        }
        default:{
            return false;
        }
    }
    return true;
}
点击运行,保存所有,此时LED按键应该能切换所示LED状态框的颜色,如图所示
按照第5步的方法添加逆时针移步和顺时针移步的clicked槽方法,逻辑代码如下(注意对应关系)
void LEDWindows::on_lastStep_clicked()
{
    if (!isRotated){
        LEDWindows::moveLEDLeft();
        LEDWindows::hardwareMove(1);
    }else {
        printf("WARNING: Can not change state while rotatin\n");
    }
}

void LEDWindows::on_nextStep_clicked()
{
    if (!isRotated){
        LEDWindows::moveLEDRight();
        LEDWindows::hardwareMove(2);
    }else {
        printf("WARNING: Can not change state while rotatin\n");
    }
}
添加界面移步工具方法以及连接硬件API移步方法,代码如下:
// move step util
void LEDWindows::moveLEDLeft(){
    bool tmp = states[0];
    for (int i = 0; i < 3; i++){
        states[i] = states[i + 1];
    }
    states[3] = tmp;
    update();
    return;
}

void LEDWindows::moveLEDRight(){
    bool tmp = states[3];
    for (int i = 3; i > 0; i--){
        states[i] = states[i - 1];
    }
    states[0] = tmp;
    update();
    return;
}

/* connect to hardware move step
*  @param position: 1 -> move anticlockwise
*                  2 -> move clockwise
*/
void LEDWindows::hardwareMove(int position){
    int res[2] = {position, 0};
    FS4412_LED_rotate(fd_LED, res);

}
点击运行,保存所有,执行图2逆时针移步操作,结果如图3所示。顺时针同理
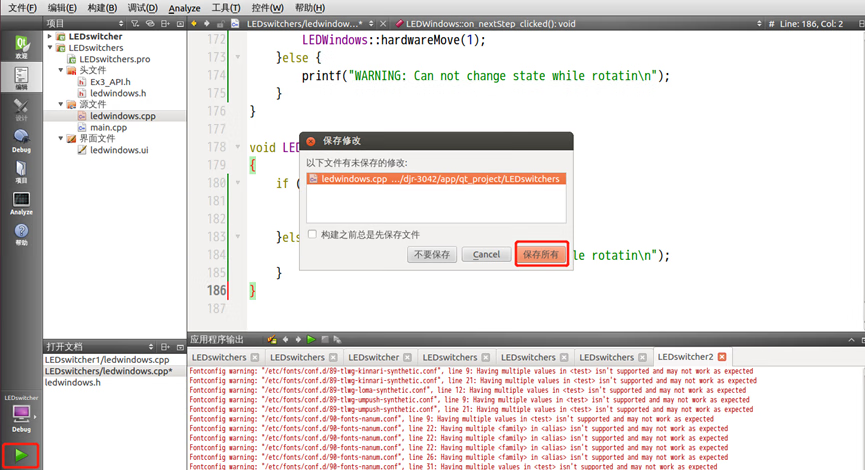
图1 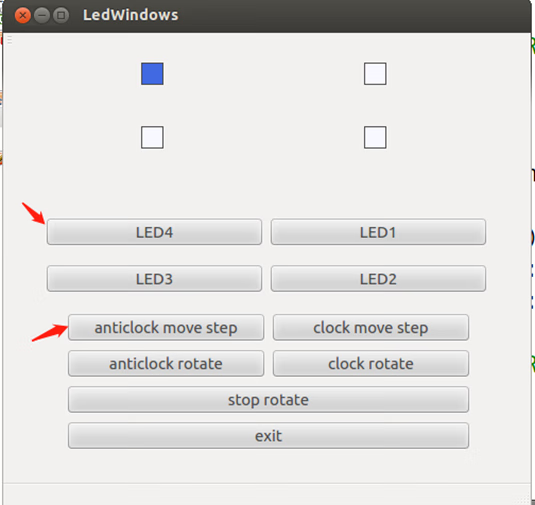
图2 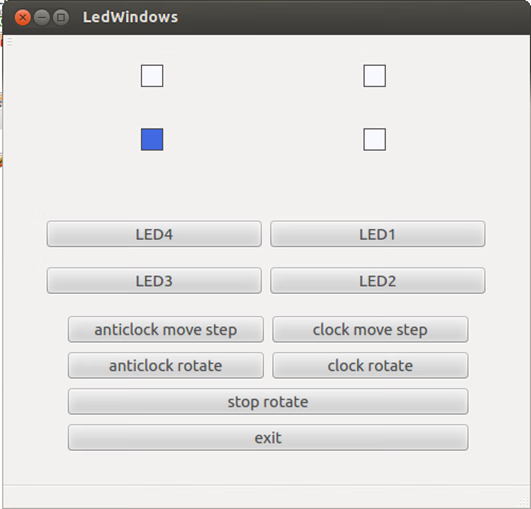
图3 按照第5步方法继续添加逆时针旋转、顺时针旋转、停止旋转按钮的clicked槽函数,逻辑代码如下:(注意对应关系)
void LEDWindows::on_anticlockRotate_clicked()
{
  isRotated = true;
  //reset timer
  LEDWindows::hardwareStop();
  int res[2] = {3, delay};

  // connect timer to moveLEDLeft function
  connect(timer, &QTimer::timeout, this, &LEDWindows::moveLEDLeft);

  // set each loop delay
  timer->start(delay);

  // must set delay(um) at main thread equal to delay time(ms)
  usleep(500000);
  FS4412_LED_rotate(fd_LED, res);
}

void LEDWindows::on_clockRotate_clicked()
{
  isRotated = true;

  //reset timer
  LEDWindows::hardwareStop();
  int res[2] = {4, delay};

  // connect timer to moveLEDLRight function
  connect(timer, &QTimer::timeout, this, &LEDWindows::moveLEDRight);

  // set each loop delay
  timer->start(delay);

  // must set delay(us) at main thread equal to delay time(ms)
  usleep(500000);
  FS4412_LED_rotate(fd_LED, res);
}
编写硬件停止相关工具方法,代码如下:
// hardware stop util
void LEDWindows::hardwareStop(){
  //reset timer
  timer->stop();
  timer->disconnect();
  int res[2] = {0, 0};
  FS4412_LED_rotate(fd_LED, res);
}
点击运行,保存所有,执行图2逆时针旋转操作,结果如图3(动图,如无法播放请跳过),点击停止旋转即可停止旋转。顺时针旋转同理
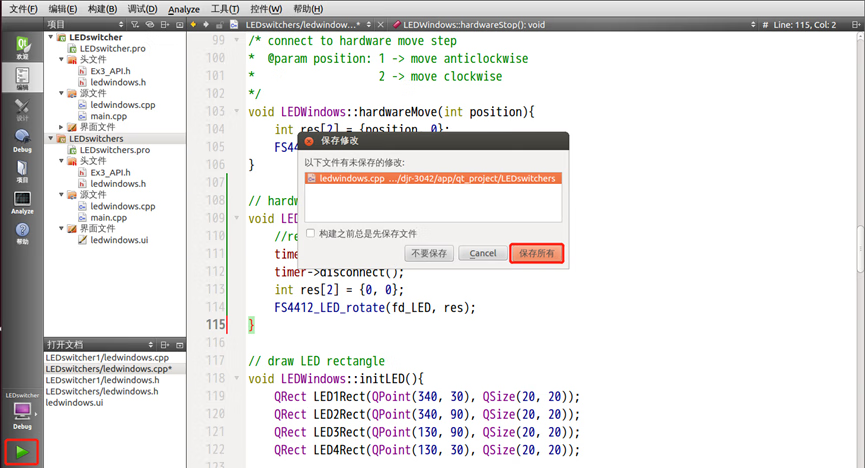
图1 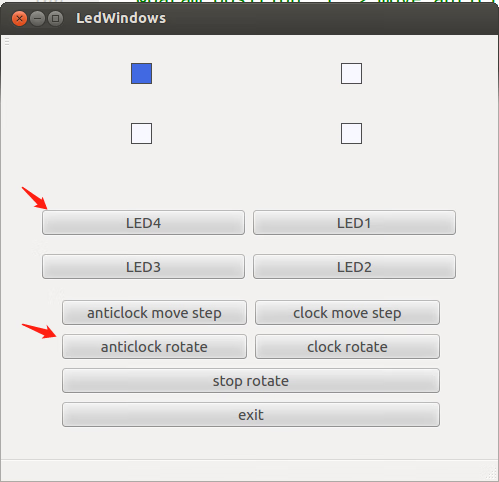
图2 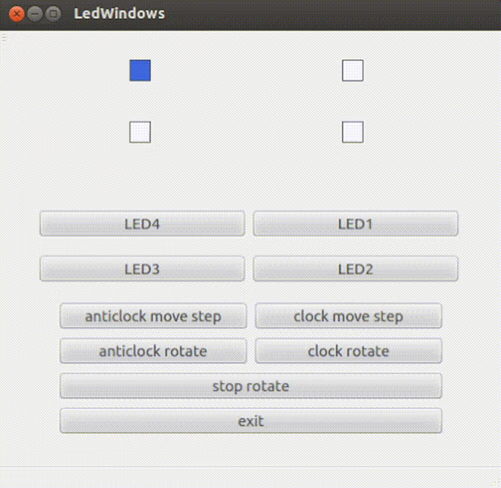
图3 按照第5步添加退出按钮的clicked槽方法,并编写逻辑代码,代码如下:(该代码只能在模拟环境下关闭窗口,在实验箱上无法关闭窗口)
void LEDWindows::on_exit_clicked()

{
  QApplication::quit();
}
至此全部功能实现